Create custom reports with Report Builder 2.0
With Report Builder 2.0, you can create a variety of library and patron reports. Just choose the information and format you want, and Destiny builds the report for you.
|
Note: The original report builder, Report Builder Classic, is also available on the Custom Reports page (Reports > Custom Reports). |
Quick steps to build a custom report
Once you start a new report:
- Choose your data.
- See how your report will look.
- Filter, sort, and group data (optional).
- Save and generate the report.
Note: For large reports at districts with many sites, Destiny may schedule them to run after hours to maintain fast and reliable system performance. Learn more
More things to do after generating a report:
- Edit a report.
- Copy a report.
- Import/export to share across sites.
- Add to My Favorites.
- Delete a report.
- Access a saved report.
Start a new report
Here's how to access Report Builder 2.0 and get started.
-
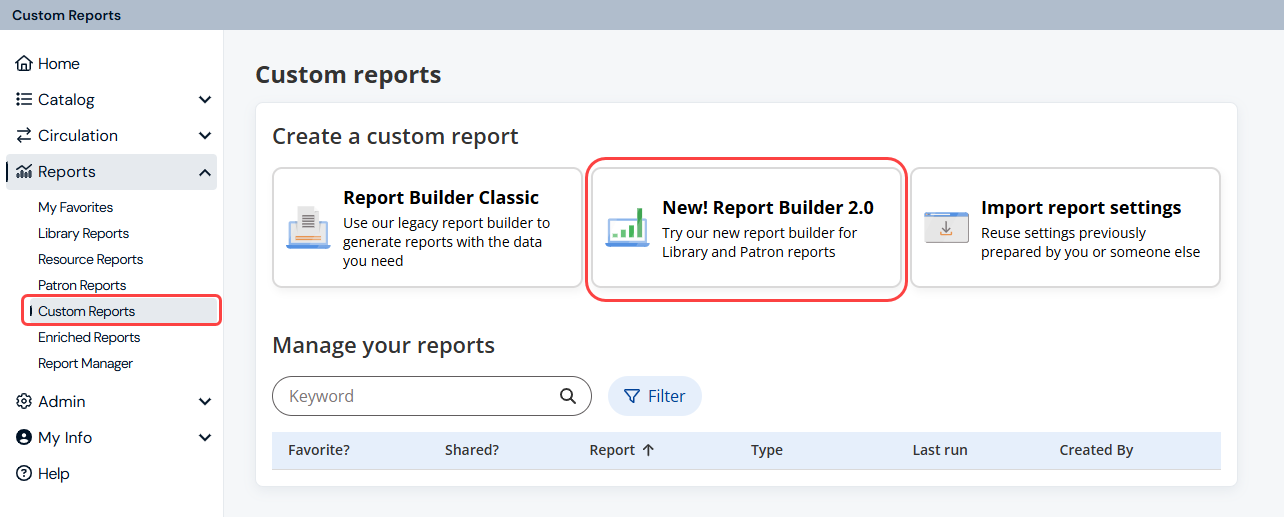
Select Reports > Custom Reports > Report Builder 2.0.
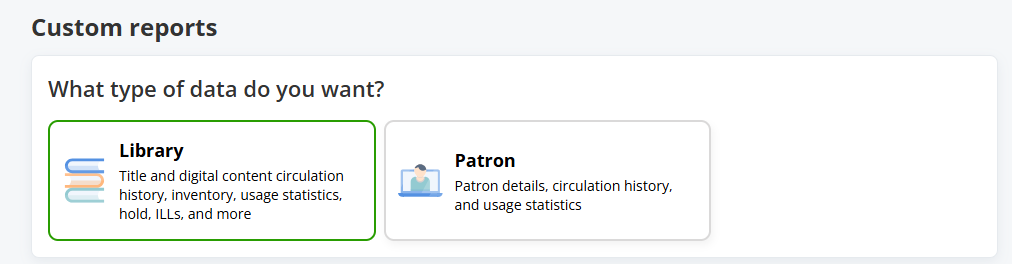
- Select the type of data you want: Library or Patron.
Step 1: Choose your data
In this step, select the data you want to include in your report.
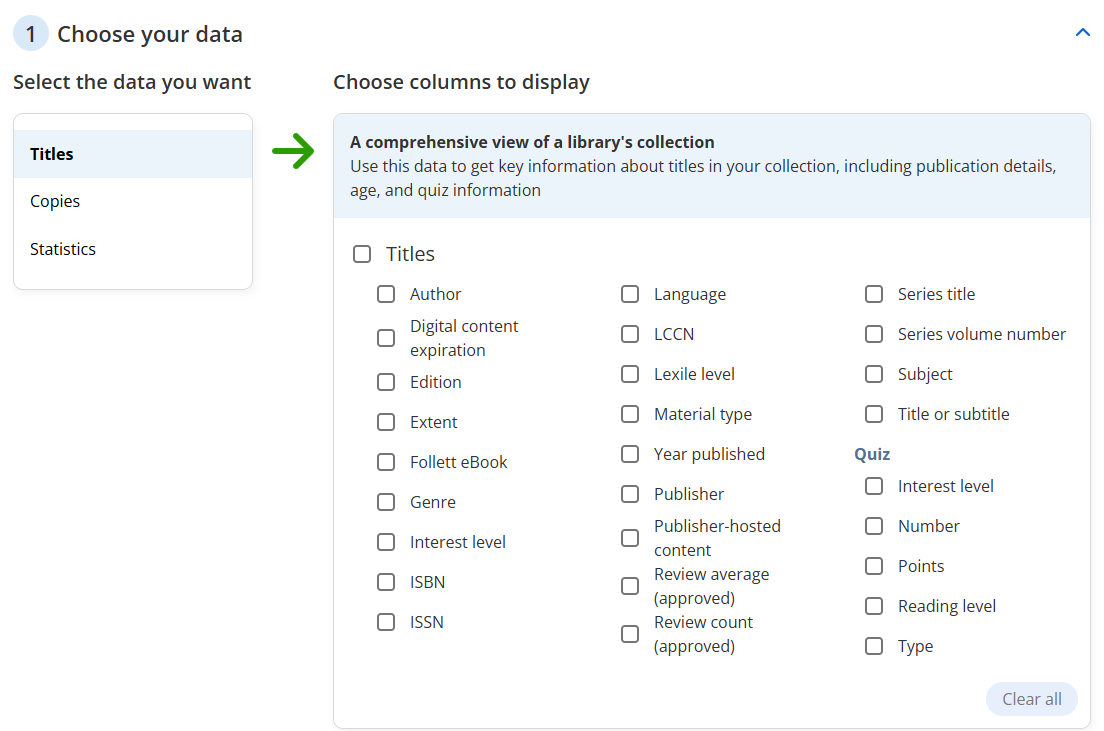
- Under Select the data you want, choose one of the following (options vary based on your selection in the previous step):
- Titles (Library)
- Copies (Library)
- Statistics (Library)
- General Information (Patron)
- Current Checkouts (Patron)
- Current Fines/Refunds (Patron)
- Current Holds/Bookings (Patron)
- Under Choose columns to display, select the fields you want to show in your report.
Notes:
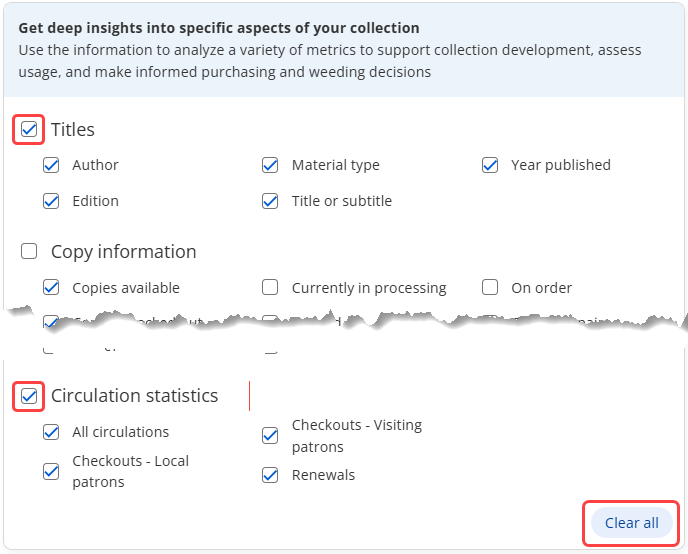
- To select/deselect all fields in a category, select the checkbox next to the category name (for example, Titles or Circulation statistics). To deselect all checkboxes, click Clear all.
- If you are creating a district-level report, you can include columns for site information (site name, site short name, and site type).
- To select/deselect all fields in a category, select the checkbox next to the category name (for example, Titles or Circulation statistics). To deselect all checkboxes, click Clear all.
Step 2: See how your report will look
In this step, you can preview your report.

- Click Preview report to see the first 10 rows of data.
- Do any of the following:
- To change the order of the columns, click a column header and drag it to the desired location; or, click
 , and then under Move column, select Left or Right.
 - To include summary statistics for a column, click , and then under Show at bottom of column, select any of the following:
- Column total (sum of the column's values)
- Average (average value of items in the column)
- Smallest value of any item (lowest value of any item in the column)
- Largest value of any item (highest value of any item in the column)
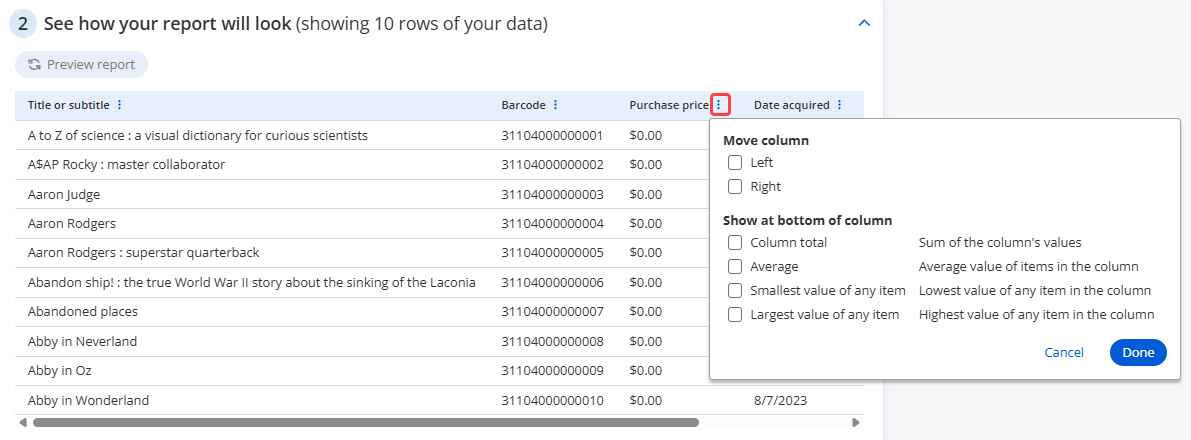
Note: Summary statistics are not available in Excel format.
- To change the order of the columns, click a column header and drag it to the desired location; or, click
Step 3: Filter, sort, and group data (optional)
In this step, you can refine and organize your report.
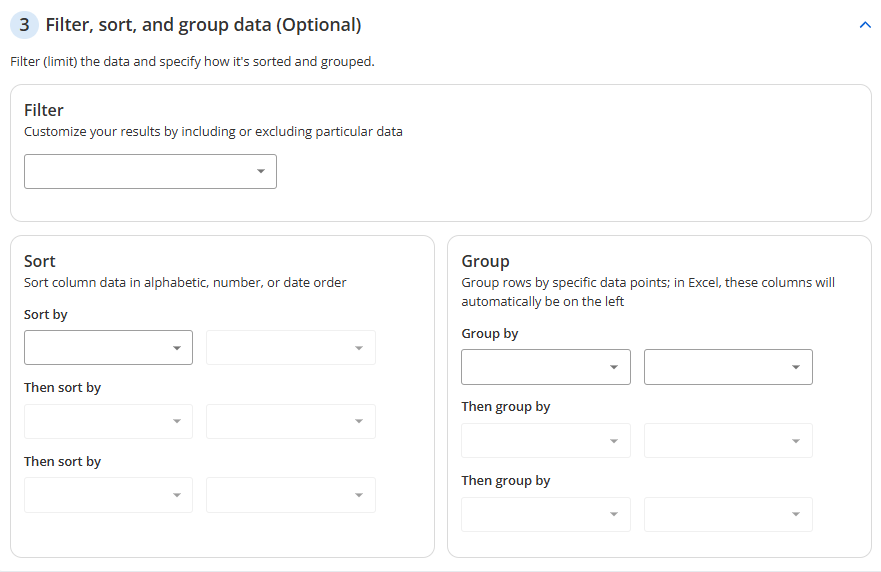
Filter
Filters help give your report more focus by including or excluding particular data. For example, if you are running a report on lost copies, you can limit it to copies lost within a date range.
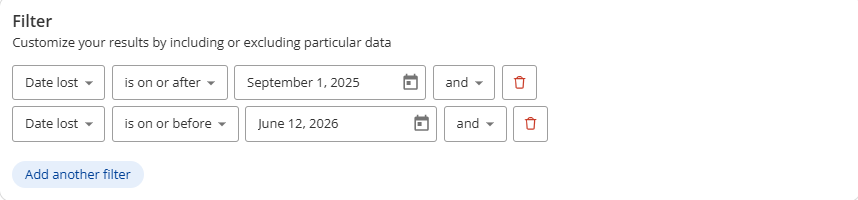
- From the Filter drop-down, select a limiter. Additional drop-downs appear.
- From the second drop-down, select an operator.
- From the third drop-down, select or type a value (depending on the filter you selected).
- In the fourth drop-down, select one of the following:
- AND: Includes all records that meet every limiter
- OR: Includes all records that meet at least one of the limiters
- To add an additional filter, click Add another filter and repeat steps b-d. You can set up to 10.
Sort
You can sort column data in alphabetic, numerical, or date order. By default, reports sort in ascending order.
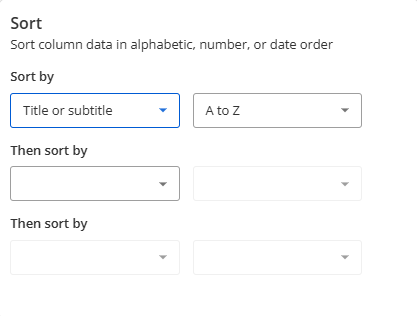
- From the Sort by drop-down, select a primary sorting option.
- In the drop-down next to Sort by, choose the sort order.
- If you want to further sort the data, use the Then sort by drop-down(s), and repeat the previous steps.
Group
Grouping rows by specific data points can help make your report easier to understand. However, if you just need a simple list of statistics, you might decide not to group the information.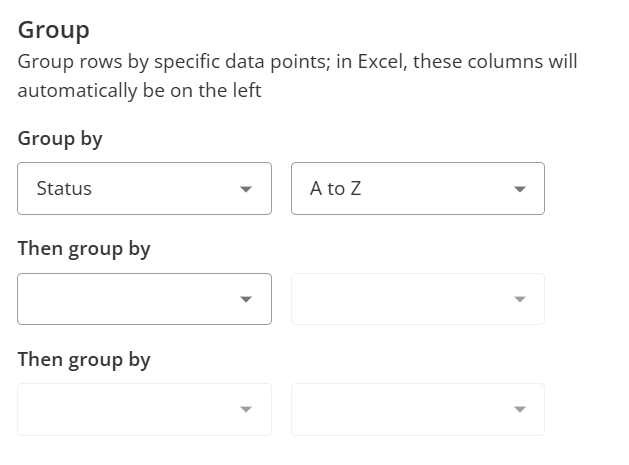
- From the Group by drop-down, select a primary grouping option.
- From the second drop-down for your primary grouping option, choose the order.
- If you want to further group the data, use the Then group by drop-down(s), and repeat the previous steps.
Step 4: Save and generate the report
In the last step, save and run the report.
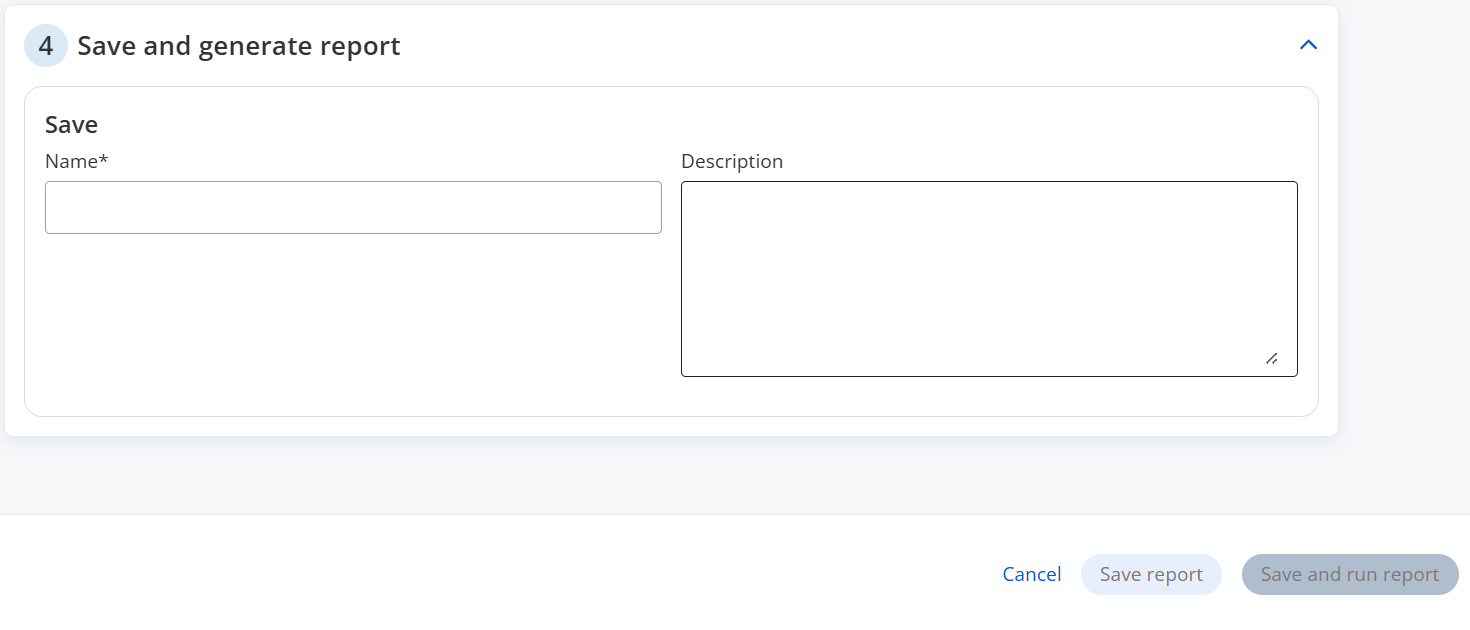
- Type a Name for the report.
- Type a Description (optional).
- If you are creating a district-level report:
- Under Share report with, select District-level only or District and sites.
- If you selected District and sites, from the drop-down that appears, choose if you want to share the report with all schools, a site type, or a specific school.
- There are two options for saving the report:
-
To save the report setup for later use, click Save report.
-
To save the report and run it immediately, click Save and run report.
- If you selected Save and run report in the previous step, Report Manager displays your report at the top of the list and automatically updates its status. When the status is Completed, do one of the following:
- To view the Job Summary, select View.
- To view your report online, select HTML.
- To download the report as an XML file, which can be exported into Microsoft Excel, select XML.
- To open or save a spreadsheet file in Excel, select Excel®.
Access a saved report
You can access reports you and other users saved.
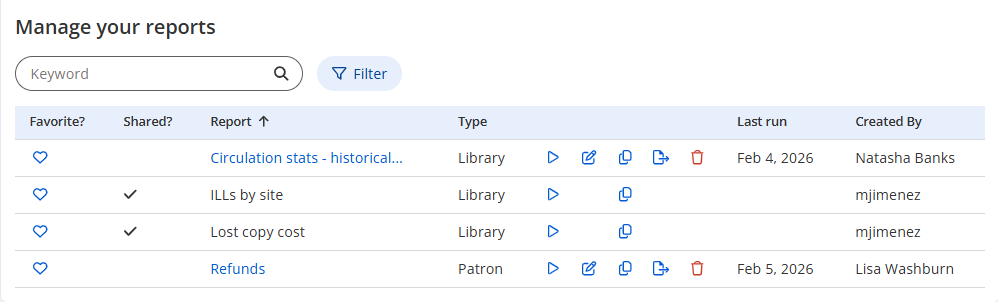
- Select Reports > Custom Reports.
- From the Manage your reports section, you can run, edit, copy, export, or delete the report.
|
Notes:
|
Edit a saved report
You can edit a saved Report Builder report at any time. If a report was created in Report Builder Classic, you will have the option to edit it in Report Builder 2.0 or keep it in Report Builder Classic.
|
Important: Edits will appear for all users who can access the report. |
- Select Reports > Custom Reports.
- In the Manage your reports section, next to the report you want to edit, click
 .
. -
If the report was created in Report Builder Classic, a pop up appears. Choose to Use Report Builder 2.0 or No thanks (to use Report Builder Classic) to edit the report.
Notes:
- If you use Report Builder 2.0 to edit the report, Destiny will use report settings previously set up with Report Builder Classic, and all future changes will be made to that report in Report Builder 2.0.
- If you do not want the pop-up to appear each time you edit a Report Builder Classic report, select the Don't ask me which report builder to use each time I edit a legacy report checkbox, and then select Use Report Builder 2.0 or No thanks (to use Report Builder Classic) to automatically edit reports in the selected format in the future.
- Depending on the report builder you use, follow the Report Builder 2.0 or Report Builder Classic steps to make any changes.
Copy a report
You can duplicate any saved Report Builder report. This lets you modify a complex report without affecting the original, or set up a report with slightly different settings.
- Select Reports > Custom Reports.
- Next to the report you want to copy, click .
- Review and make any changes to the report.
- Save the report.
Delete a report
You can delete a site-level report at any time. District-level reports can only be deleted by district users.
|
Important: Deleting a report removes it for all users. |
- Select Reports > Custom Reports.
- Next to the report you want to delete, click
 . A pop-up appears.
 - To confirm the deletion, click Yes, delete.