Check out By Homeroom (Library Manager)
To check out by homeroom, you first have to define homerooms. Once homerooms are defined, you need to assign patrons to the applicable homeroom.
The By Homeroom checkout option eliminates the need to scan patron barcodes or type patron names. Instead, you select patron names from a homeroom list.
|
Note: This option is only available if your Destiny records contain homeroom information. This is usually automatically added from your Student Information System. Other methods are covered in Destiny Help. |
To check out materials By Homeroom:
- Select Circulation > Check Out > By Homeroom tab.
- From the Homeroom drop-down, select the appropriate homeroom, and then click Go to Homeroom.
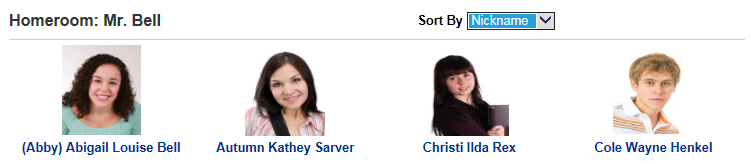
- To sort results by First Name, Last Name, or Nickname (appears in parentheses), select from the Sort By drop-down.
Note: The Sort By drop-down defaults to last name.
- Select a student’s name or picture to check out to that student.
- After you select the patron’s record, scan the first item’s barcode in the Find field. The item appears in the Checked Out section. Scanning a second item moves the first book to the Items Out section.
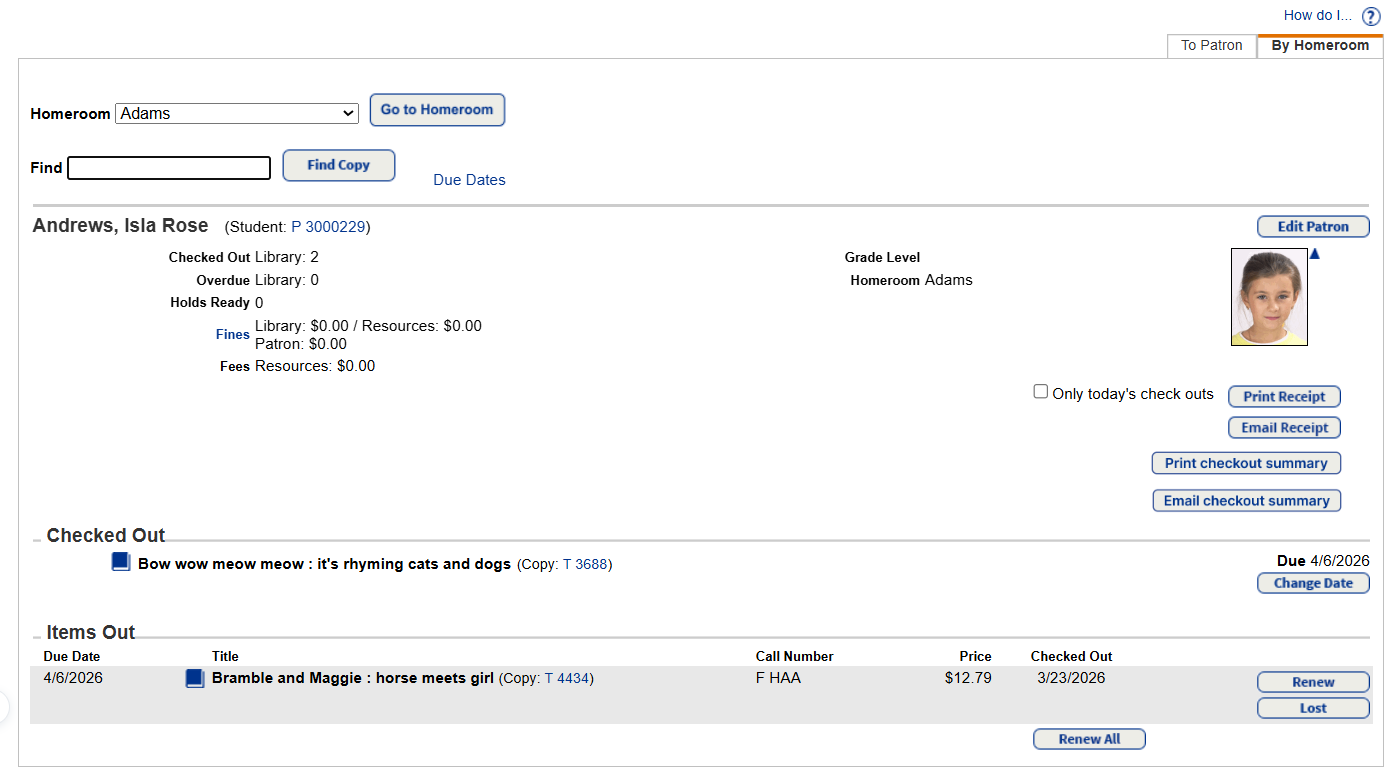
Notes:
- If a patron has fines or overdue items, or if a copy has an In Quarantine status, you will receive a blocked transaction message. Users with the Override library blocks permission can bypass the block.
- To edit the due date for the item in the Checked Out section, click Change. Select the new due date and whether it is for this item, this patron, or the rest of this session.
- When copies are in the Items Out section, you have the option to either Renew or mark them Lost.
- Do any of the following:
- To print a receipt: Click Print Receipt to open a printable PDF.
- To email a receipt:
- Click Email Receipt, and then select the email addresses to include.
- Click Send.
- Receipts with product-specific fine data will honor the View library fines, View resource fines, View textbook fines, and View patron fines permissions. This means users will only see associated info on the receipt. For example, users with the View resource fines permission will only be able to see resource-related receipts.
-
To customize receipts, see Set up receipts and refund notifications.
- To print a checkout summary: Click Print checkout summary to open a printable PDF.
- To email a checkout summary:
- Click Email checkout summary, and then select the email addresses to include.
- Click Send.
- To use email features in Destiny, the Destiny Administrator needs to set up the SMTP mail server.
- When you click Email Receipt or Email checkout summary, a list of email fields you can select from appears. The email options available are based on Site Configuration settings (Admin > Site Configuration > Receipts/Refund Notifications).
- Do any of the following:
- To check out items to another student from the same homeroom, click Go to Homeroom.

- To check out items to another student from a different homeroom or to check out by patron, click Go to Homeroom, and then click Change homeroom or check out by patron.
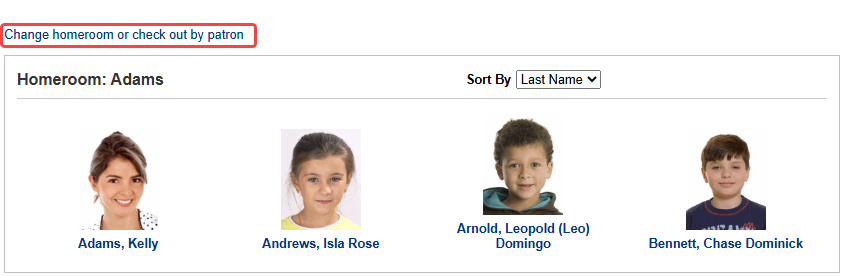
Note: Depending on how your site is configured, clicking Reset Checkout will bring you back to the currently selected homeroom, or to the page where you select a homeroom.
- To check out items to another student from the same homeroom, click Go to Homeroom.
|
If you want to... |
Then... |
|
|---|---|---|
| Provide a receipt |
|
|
|
Provide a checkout summary |
|
|
Notes: |
For instructions on how to:
- Check out copies To Patron, seeCheck out To Patron (Library Manager).
- Hide a patron's barcode on checkout, see Hide patron barcode on checkout and check-in.